
Websites, especially content management systems like Implement WordPress, often contain sensitive information that needs to be safeguarded from unauthorized access. One powerful tool in the realm of cybersecurity is Two-Factor Authentication (2FA), which adds an additional layer of protection to user accounts by requiring users to provide two different authentication factors before granting access. In this article, we will delve into the importance of implementing 2FA on your WordPress site and provide a step-by-step guide to help you set it up effectively.
Table of Contents
The Importance of Two-Factor Authentication
Two-Factor Authentication (2FA) is a security mechanism that enhances traditional username and password logins. It requires users to provide two distinct types of authentication before granting access: something they know (password) and something they have (a unique code or device). This adds an extra layer of security, as even if a hacker manages to obtain a user’s password, they would still need the second factor to gain entry.
For WordPress site owners, implementing 2FA helps mitigate various security risks:
- Password Vulnerabilities: Many users still use weak passwords or reuse passwords across multiple sites. 2FA reduces the risk of unauthorized access even if a password is compromised.
- Phishing Attacks: Even if a user falls victim to a phishing attack and unknowingly provides their password, the attacker would still need the second factor to gain access.
- Brute Force Attacks: Hackers often attempt to crack passwords through automated brute force attacks. 2FA adds an extra layer of defense against such attacks.
- Stolen Credentials: If a database breach exposes usernames and passwords, 2FA can prevent unauthorized access by requiring the second factor.
We will explore three popular 2FA plugins to implement enhanced security on your WordPress site.
1.miniOrange’s Google Authenticator
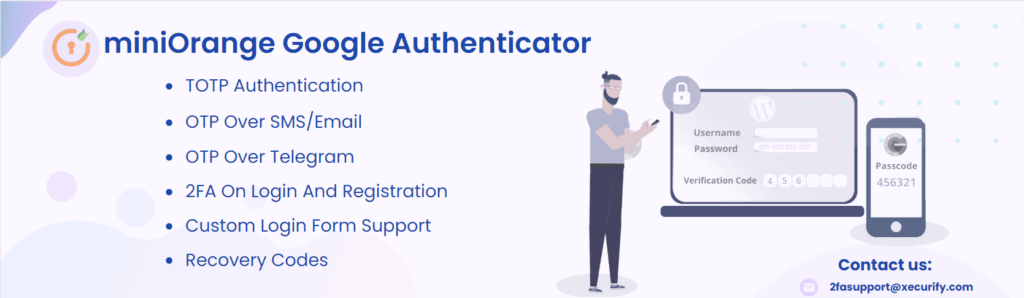
This plugin, developed by miniOrange, provides a comprehensive two-factor authentication solution for WordPress sites. It supports Google Authenticator, email verification, OTP over SMS, and OTP over email as authentication methods. Users can choose their preferred method and set up 2FA easily. The plugin also offers features like login protection, password policies, and more to enhance overall site security.
2.Two Factor Authentication By David Anderson:

Developed by David Anderson, this plugin focuses on simplicity and effectiveness. It supports various authentication methods, including Time-based One-Time Passwords (TOTP), email, and FIDO U2F devices. Users can choose their desired method for 2FA setup. The plugin aims to make the 2FA implementation process user-friendly while offering robust security measures.
3.Shield Security – Smart Bot Blocking & Intrusion Prevention Security:

Shield Security, developed by Shield Security, is a comprehensive security plugin for WordPress. Among its features is a Two Factor module that provides 2FA options like email, TOTP, and backup codes. The plugin emphasizes user-friendly setup and management of security features. It also offers other security enhancements, such as malware scanning and login protection.
Comparison:
- Authentication Methods:
- miniOrange: Supports Google Authenticator, OTP over SMS, OTP over email, and email verification.
- David Anderson: Offers TOTP, email, and FIDO U2F authentication methods.
- Shield Security: Provides email, TOTP, and backup codes for 2FA.
- Ease of Use:
- All three plugins aim for user-friendly setup and management, offering straightforward configuration processes.
- Additional Security Features:
- miniOrange and Shield Security offer other security features beyond 2FA, such as password policies, login protection, and more.
- Two Factor Authentication by David Anderson focuses primarily on 2FA without an extensive array of additional security features.
- Customization:
- miniOrange and Shield Security provide multiple authentication methods and advanced settings for customization.
- Two Factor Authentication by David Anderson emphasizes simplicity and ease of use, which might mean fewer customization options compared to the other two.
- Support and Documentation:
- Support and documentation quality can vary, so it’s recommended to check each plugin’s documentation and support channels.
- Compatibility:
- Ensure that the chosen plugin is compatible with your WordPress version and other plugins you may have installed.
- Popularity and Reviews:
- Check user reviews, ratings, and the popularity of the plugins in the WordPress plugin repository to gauge user satisfaction and reliability.
Setup Two Factor Authentication in WordPress with miniOrange’s Google Authenticator
Step 1: Install and Activate the Plugin
- Log in to your WordPress dashboard.
- Navigate to “Plugins” > “Add New.”
- In the search bar, type “miniOrange’s Google Authenticator” and press “Enter.”
- Locate the plugin and click the “Install Now” button.
- Once installed, click the “Activate” button to activate the plugin.
Step 2: Configure the Plugin
- After activation, you’ll see a new menu item called “miniOrange 2-Factor” in your WordPress dashboard. Click on it.
- You’ll be directed to the miniOrange website for plugin setup. If this is your first time using the plugin, you might need to create a miniOrange account and log in.
Step 3: Configure Google Authenticator
- After logging in, you’ll be prompted to set up Google Authenticator. Select “Google Authenticator” as the method.
- Follow the on-screen instructions to configure Google Authenticator. You’ll need to scan a QR code using the Google Authenticator app on your mobile device.
- Once scanned, the app will generate a six-digit code. Enter this code in the miniOrange setup page to verify the connection.
Step 4: Set Up Email as Backup Method
- After configuring Google Authenticator, you’ll be prompted to set up an email as a backup method. This will allow you to receive OTP codes via email in case you can’t access your mobile device.
- Follow the instructions to set up the email backup method.
Step 5: Test the Configuration
- Once both Google Authenticator and the email backup method are set up, it’s time to test the configuration.
- Log out of your WordPress dashboard and attempt to log in again.
- You’ll be prompted to enter a verification code. Open the Google Authenticator app on your mobile device and enter the code generated for your WordPress site.
Step 6: Enforce 2FA for Users
- Once you’ve tested the setup and everything works correctly, you can start enforcing 2FA for all users.
- Go to the “Users” section in your WordPress dashboard.
- Edit each user’s profile and enable 2FA for them. They will need to complete the setup process similar to the steps you followed.
Step 7: Customization and Additional Settings
- Navigate to the “miniOrange 2-Factor” menu in your dashboard.
- Explore the various settings to customize the plugin behavior, such as restricting certain user roles from using 2FA or enabling trusted devices.
- Adjust the settings according to your preferences.
Step 8: Backup and Recovery
- miniOrange offers options for users to set up backup methods, such as email. Make sure your users are aware of these backup methods in case they lose access to their primary 2FA method.
By following these steps, you can successfully set up “miniOrange’s Google Authenticator – WordPress Two Factor Authentication – 2FA” plugin on your WordPress site. This will enhance your site’s security by adding an extra layer of protection through Two-Factor Authentication.
Setup the Two Factor Authentication By David Anderson plugin on your WordPress site:
Step 1: Install and Activate the Plugin
- Log in to your WordPress dashboard.
- Navigate to “Plugins” > “Add New.”
- In the search bar, type “Two Factor Authentication By David Anderson” and press “Enter.”
- Locate the plugin and click the “Install Now” button.
- Once installed, click the “Activate” button to activate the plugin.
Step 2: Configure the Plugin
- After activation, you’ll see a new menu item called “Two Factor Auth” in your WordPress dashboard. Click on it.
Step 3: Set Up Two-Factor Authentication Methods
- On the “Two Factor Auth” settings page, you’ll see various authentication methods that the plugin supports, such as TOTP, email, and FIDO U2F.
- Choose the authentication methods you want to enable for your users. For example, you can enable TOTP and email methods.
Step 4: Configure TOTP Authentication
- If you’ve chosen TOTP (Time-based One-Time Password) as an authentication method, you’ll need to configure it.
- Click on the “Configure TOTP” link next to TOTP in the settings.
- Follow the instructions to set up TOTP using a mobile authenticator app like Google Authenticator or Authy. Scan the QR code provided and enter the code generated by the app to verify.
Step 5: Configure Email Authentication
- If you’ve chosen email as an authentication method, you’ll need to configure it.
- Click on the “Configure Email” link next to Email in the settings.
- Follow the instructions to set up email authentication. This typically involves sending a verification code to the user’s email and having them enter it to verify.
Step 6: Enable Two-Factor Authentication for Users
- After configuring the authentication methods, you can start enabling Two-Factor Authentication for users.
- Go to the “Users” section in your WordPress dashboard.
- Edit a user’s profile and scroll down to the “Two Factor Auth” section.
- Enable the “Two Factor Auth” checkbox for the user.
- Choose the authentication methods you want to enforce for that user (e.g., TOTP, email).
- Save the user’s profile.
Step 7: Testing the Configuration
- Log out of your WordPress dashboard and attempt to log in again.
- You’ll be prompted to enter the second factor based on the method you configured for your user.
Step 8: Backup and Recovery
- Advise your users to set up backup methods if they’re using Two-Factor Authentication. This could be an alternative authentication method like email or having backup codes.
By following these steps, you can successfully set up the “Two Factor Authentication By David Anderson” plugin on your WordPress site. This plugin provides various authentication methods, including TOTP and email, to enhance the security of your site through Two-Factor Authentication.
Setup the “Shield Security – Smart Bot Blocking by Shield Security” plugin on your WordPress site:
Step 1: Install and Activate the Plugin
- Log in to your WordPress dashboard.
- Navigate to “Plugins” > “Add New.”
- In the search bar, type “Shield Security” and press “Enter.”
- Locate the plugin and click the “Install Now” button.
- Once installed, click the “Activate” button to activate the plugin.
Step 2: Configure the Plugin
- After activation, you’ll see a new menu item called “Shield” in your WordPress dashboard. Click on it.
Step 3: Enable Two Factor Authentication Module
- In the Shield dashboard, click on the “Modules” tab.
- Find the “Two Factor” module and click on it to enable it.
Step 4: Configure Two Factor Authentication
- After enabling the “Two Factor” module, click on the “Two Factor” tab in the Shield dashboard.
- You’ll see options for different Two Factor methods, such as email, TOTP, and backup codes.
- Configure the methods you want to offer to your users by toggling the respective switches. For example, enable “Email 2FA” and “TOTP 2FA.”
- Customize settings for each method, such as enabling a grace period or specifying the number of codes to send via email.
Step 5: Enable Two Factor Authentication for Users
- Go to the “Users” section in your WordPress dashboard.
- Edit a user’s profile and scroll down to the “Two-Factor Authentication” section.
- Enable the “Two-Factor Authentication” checkbox for the user.
- Choose the authentication methods you want to enforce for that user (e.g., email, TOTP).
- Save the user’s profile.
Step 6: Testing the Configuration
- Log out of your WordPress dashboard and attempt to log in again.
- Depending on the methods you’ve configured, you’ll be prompted to enter a verification code from the selected method.
Step 7: Backup and Recovery
- For users who enable Two-Factor Authentication, make sure they’re aware of backup methods. Shield Security offers backup codes as an option, so users can save these codes in case they lose access to their primary authentication method.
Step 8: Customization and Additional Settings
- Explore the additional settings and customization options in the Shield dashboard to tailor the Two Factor Authentication experience to your preferences.
- Adjust settings related to Two Factor Authentication, as well as other security features provided by the plugin.
Conclusion
Implementing Two-Factor Authentication on your WordPress site is a crucial step in enhancing its security. By requiring users to provide an additional authentication factor beyond just their password, you significantly reduce the risk of unauthorized access, data breaches, and other security threats. With the wide range of 2FA plugins available for WordPress, the implementation process has become user-friendly and customizable to fit your site’s needs. Remember that cybersecurity is an ongoing effort, so staying updated with the latest security practices and regularly reviewing your security measures is essential to keep your WordPress site secure from evolving threats.