
Contact Form 7 (CF7) is a widely used and highly regarded WordPress plugin that allows you to easily create and manage contact forms on your website. Whether you’re looking to create a simple contact form or a more complex survey, event registration, or feedback form, Contact Form 7 provides a user-friendly interface and a range of customization options. In this article, we will guide you through the process of setting up Contact Form 7 in WordPress step by step.
Step 1: Install and Activate the Contact Form 7 Plugin
- Log in to your WordPress dashboard.
- Navigate to the “Plugins” section on the left sidebar and click on “Add New.”
- In the search bar, type “Contact Form 7.”
- Locate the Contact Form 7 plugin from the search results and click “Install Now.”
- After installation, click on “Activate” to activate the plugin.
Step 2: Create a New Contact Form
- Once the plugin is activated, you will see a new menu item called “Contact” in the left sidebar. Click on it to access the Contact Form 7 settings.
- Click on “Add New” to create a new contact form.
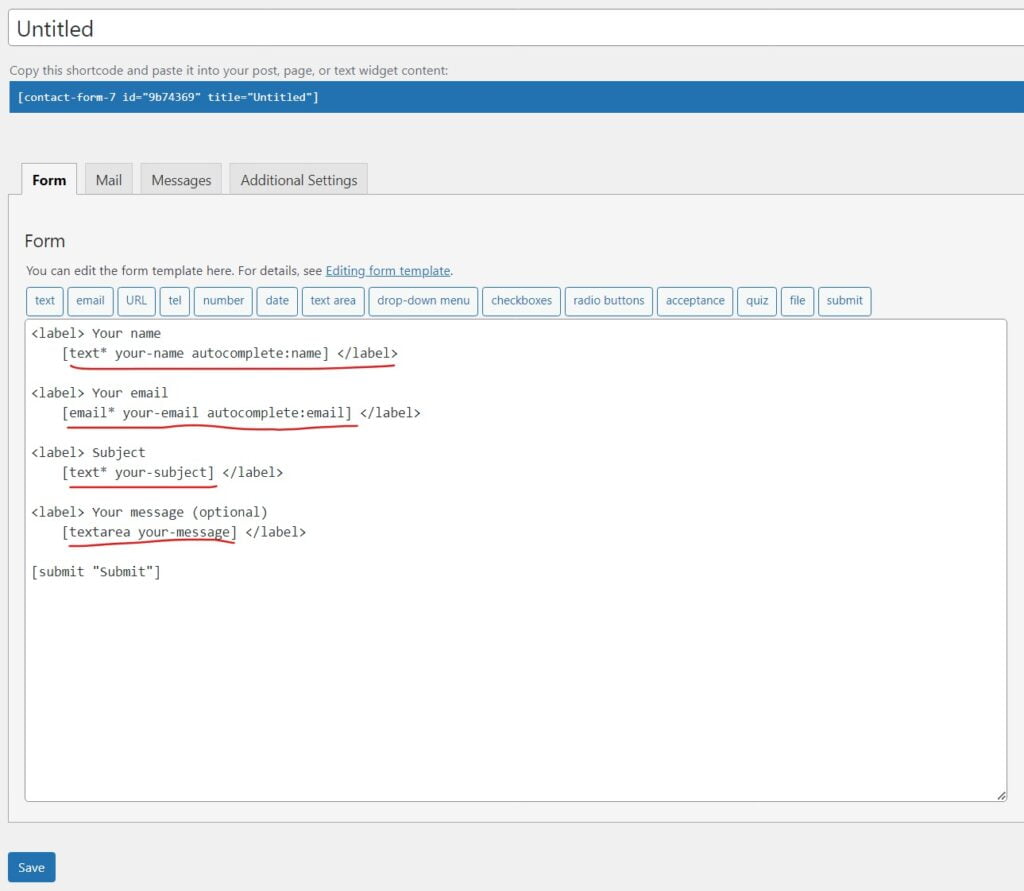
- You will be taken to the form editor. The default form template includes fields like Name, Email, Subject, and Message. You can modify these fields or add new ones by using the available tags. Tags are shortcodes that generate form elements.
Step 3: Customize the Form Fields
Customizing form fields in Contact Form 7 allows you to tailor the form to your specific needs. You can edit default fields and add new ones using tags (shortcodes). Here’s a more detailed breakdown:
- Edit Default Fields:
- Click on the field you want to edit within the form editor. This will open the field settings.
- Modify the field label, placeholder text (the text shown inside the input field before users start typing), and any other attributes you want to change.
- For instance, you can change “Your Name” to “Full Name.”
- Add New Fields:
- Scroll to the bottom of the form editor or the desired location within the form.
- Choose a tag from the list on the right side of the editor to add a new field. For example, choose “[text]” for a single-line text input.
- The tag will be inserted into the form editor. Customize it by adding attributes. For [text], attributes could include “id“, “class“, “placeholder“, etc.
- Example of adding a new field: [text your-phone class:form-field placeholder “Phone Number”]
- Field Arrangement:
- To reorder fields, click and drag them within the form editor to the desired position.
Step 4: Configure Mail Settings
Configuring mail settings in Contact Form 7 ensures that you receive form submissions via email. Here’s a detailed guide:
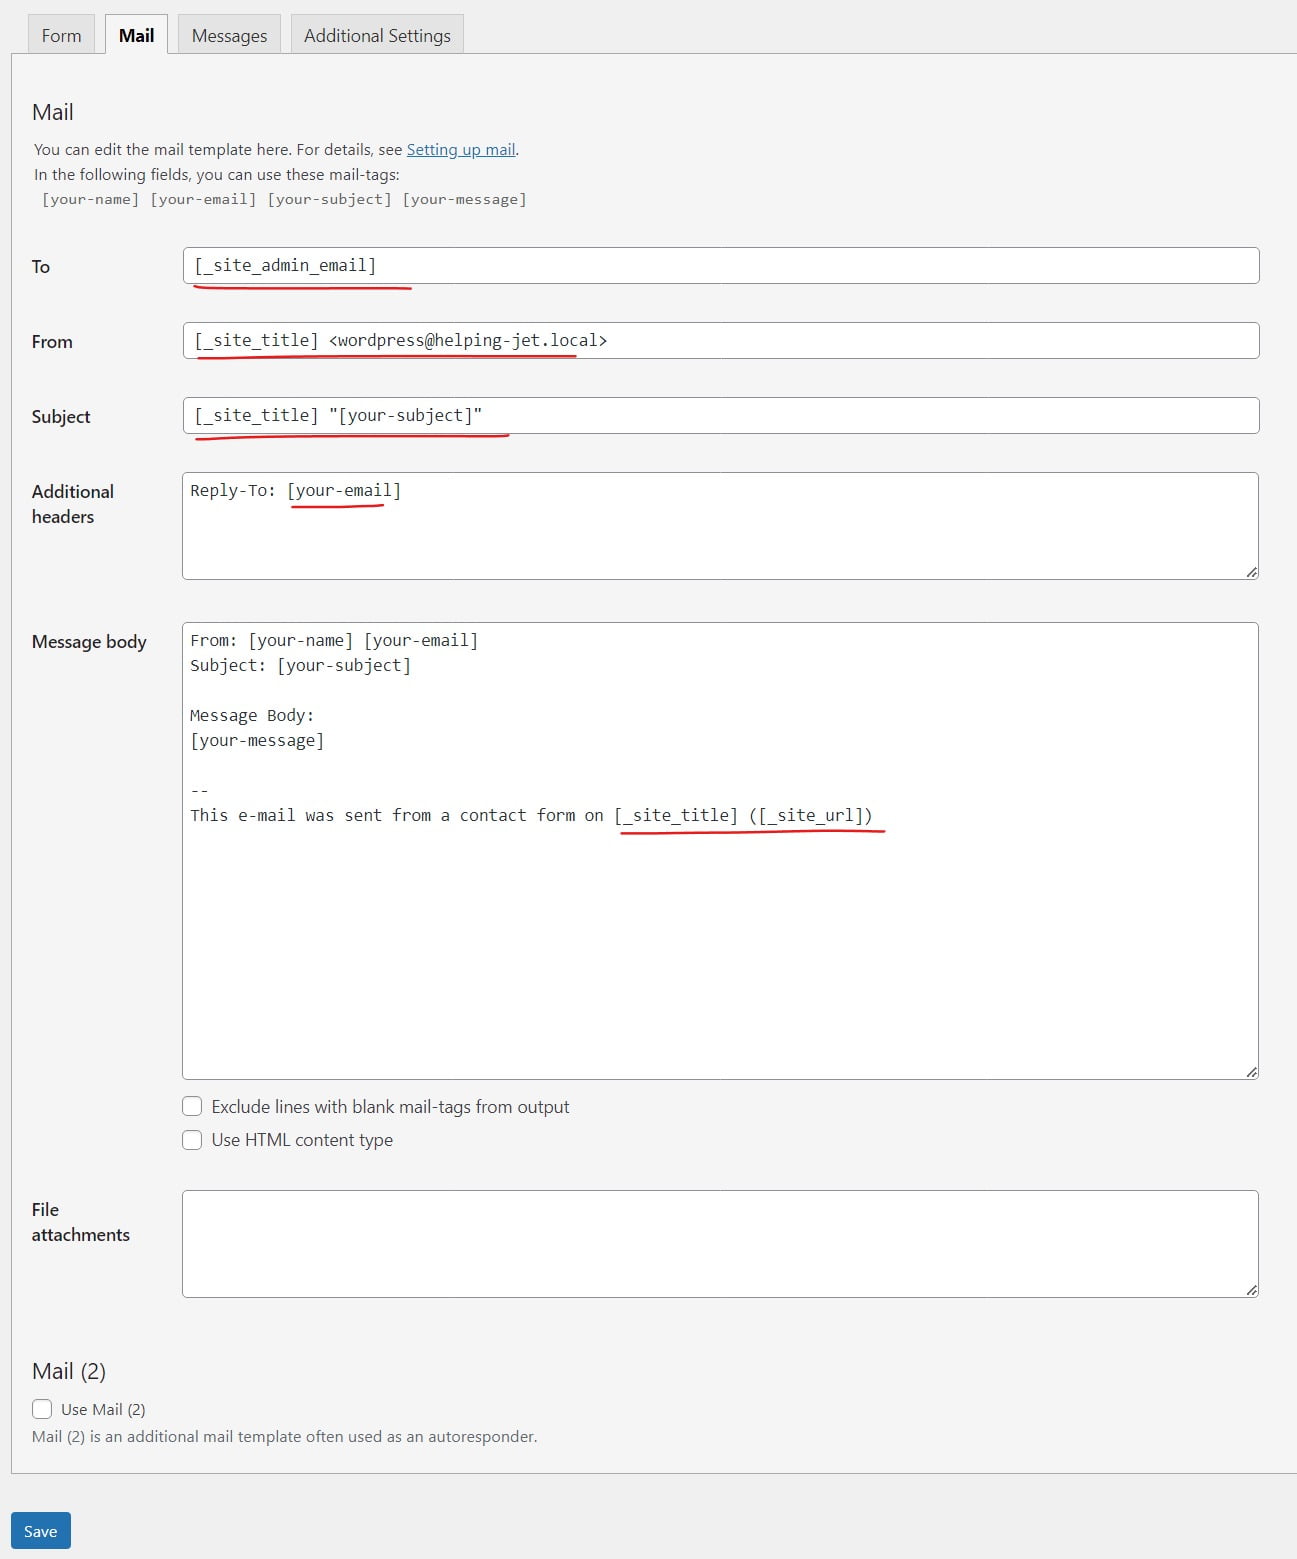
- To Field:
- In the “Mail” tab, locate the “To” field. Enter the email address where you want to receive form submissions.
- You can enter multiple email addresses, separated by commas.
- Example: to: yourname@example.com, anotheremail@example.com
- From Field:
- Customize the “From” field to indicate who the form submissions are from. You can use an email address or a custom name.
- Example: from: [your-name] <[your-email]>
- Subject Field:
- Customize the subject of the email that you’ll receive for each form submission.
- Example: subject: New Form Submission from [your-name]
- Additional Headers:
- Use the “Additional Headers” field if you need to include extra headers in the email. This is an advanced option and might not be necessary for basic setups.
Completed Form Fields Example:
Here’s an example of a completed contact form with customized fields:
HTML Code Copy code
[text* your-name class:form-field placeholder "Full Name"]

[email* your-email class:form-field placeholder "Email Address"]

[text your-subject class:form-field placeholder "Subject"]

[textarea your-message class:form-field placeholder "Your Message"]

[submit class:btn-submit "Submit"]
In this example:
- [text] represents a required single-line text input.
- [email] represents a required email input.
- [textarea] represents a multi-line text input.
The “class“ attribute is used to apply custom CSS classes for styling, and the “placeholder” attribute provides placeholder text for input fields.
By following these detailed explanations and examples, you’ll have a clearer understanding of how to customize form fields and configure mail settings in Contact Form 7 for your WordPress website.
Step 5: Set Up Form Messages
- Click on the “Messages” tab to customize the messages shown to users after form submission.
- You can edit messages for successful form submission, validation errors, and more. Customize these messages to align with your website’s tone and branding.
Step 6: Insert the Form on a Page
- After creating and customizing your form, click on the “Save” button to save your changes.
- Copy the shortcode provided at the top of the form editor.

- Create a new or edit an existing WordPress page where you want to display the form.
- Paste the shortcode into the page content editor.
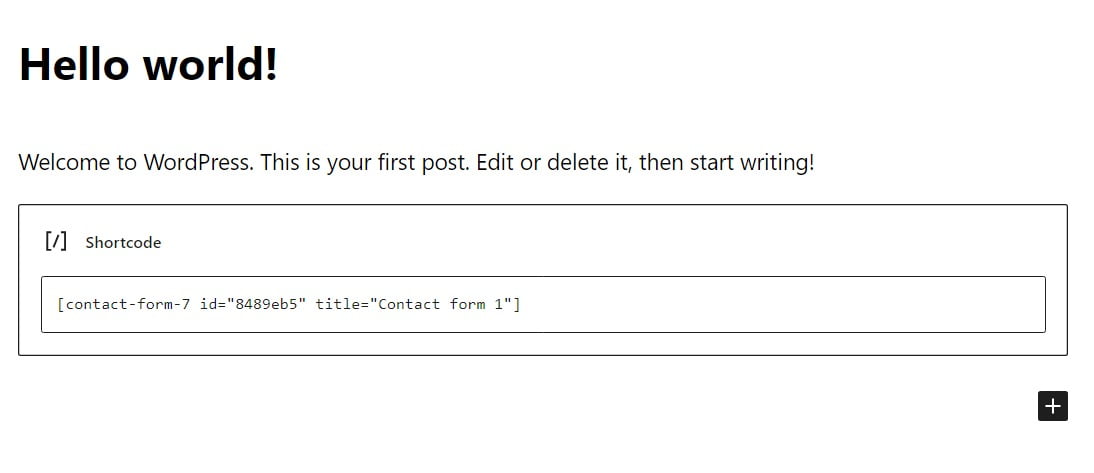
- Update or publish the page to make the form live on your website.
Step 7: Test the Form
- Visit the page where you inserted the form shortcode.
- Fill out the form with sample data and submit it to test if everything is working correctly.
- Check your email to make sure you receive the form submission.

Additional Tips:
- Styling: Contact Form 7 provides basic styling, but you can further customize the form’s appearance using CSS.
- Extensions: Consider exploring additional Contact Form 7 extensions or add-ons that can enhance the functionality of your forms.
- Anti-Spam Measures: Implement reCAPTCHA or other anti-spam measures to prevent unwanted form submissions.
Setting up Contact Form 7 in WordPress is a straightforward process that doesn’t require coding knowledge. The plugin’s flexibility and range of features make it an ideal choice for adding contact forms and other interactive elements to your website. Whether you’re a beginner or an experienced user, Contact Form 7 offers a versatile solution for collecting data and interacting with your website’s visitors.